Unity Sprite Slicing QA: Cell Size, Cell Count and Pivot
Accept a Unity sprite sheet slice when the generated SpriteRects match the export contract, their pivots use the intended units and positions, and the applied texture exposes the expected sprite sub-assets. A grid that looks plausible in the Sprite Editor is only the start of that check.
This workflow uses Unity 6.0 documentation and the Multiple sprite import path. It assumes the exported artwork has already passed source-image review. It addresses slicing and pivot acceptance, with no claim that the illustrated material was imported into Unity for this article.
Key Takeaways
- Choose Grid by Cell Size or Grid by Cell Count from the known export layout.
- Verify offset, padding, and empty-cell policy before accepting the rectangles.
- Inspect pivots in the Sprite Editor for a Multiple texture and record their units.
- Apply the result, then verify the resulting sprite sub-assets and their use in the project.
Preserve the existing slice before changing it
Keep a recoverable version of the texture and its import settings before re-slicing an asset already in use. The Slice dialog's method controls how the new result interacts with existing SpriteRects. Re-slicing is therefore an edit to an asset definition, not just a harmless preview operation. Review the available methods in the Unity 6.0 Sprite Editor reference before applying a change.
Write down the input contract: image revision, expected cell dimensions or grid count, margins, gutters, occupied cells, and intended pivots. Also record the expected sprite names or the naming convention used by downstream animation work. Attach the reviewed export evidence; the 12-frame PNG export QA example shows the separate file-level checks to complete before treating slicing as the remaining task.
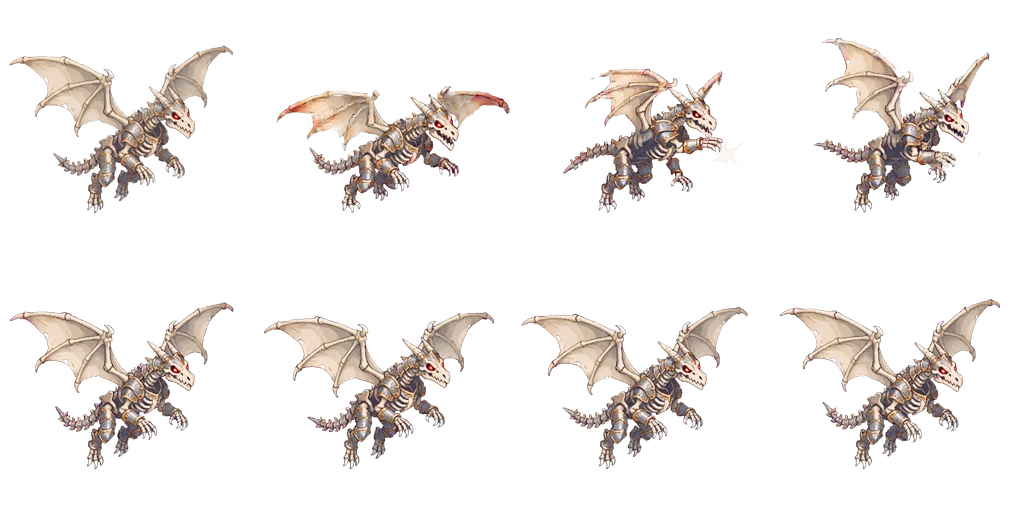
Existing public sprite-sheet illustration. This is source material, not a Unity interface screenshot, and it does not establish any particular cell dimensions or import result.
Do not infer exact dimensions from a scaled image on a web page. Use the actual export specification and source image dimensions. If they disagree, stop at the contract mismatch rather than compensating with guessed slice settings.
Use the Multiple sprite import path
Select the texture, set Texture Type to Sprite (2D and UI), and use Sprite Mode Multiple for a sheet that should produce several sprites. Open the Sprite Editor to inspect and edit those sprites. Unity's Sprite texture import settings describe this path and distinguish Single from Multiple.
The Inspector's Pivot setting is visible for Single mode. For a Multiple texture, inspect individual sprite pivots in the Sprite Editor. Looking for a Single-mode control in the Inspector can lead to changing the wrong setting or assuming a pivot has been applied to every slice.
Keep Pixels Per Unit in the same acceptance record. It describes how source pixels map to world units, rather than defining the sheet's cell size. For example, a 64-pixel-wide sprite at 64 Pixels Per Unit has a width of one world unit before other transforms. That is an illustrative conversion based on the import relationship, not a recommended universal scale.
Choose cell size or cell count from known information
Use Grid by Cell Size when the contract gives the dimensions of each cell. Use Grid by Cell Count when the contract gives the number of columns and rows. The Unity 6.0 slicing instructions describe these grid-based options. If the source layout is undocumented, use the sprite-sheet preparation guide to identify the canvas and spacing decisions that the export contract needs to state before you choose a slicing mode.
| Known input | Slicing choice | Acceptance check |
|---|---|---|
| Cell width and height in pixels | Grid by Cell Size | Generated rectangles have the specified dimensions and start positions. |
| Number of columns and rows | Grid by Cell Count | Divisions match the intended layout after accounting for margins and gutters. |
| Only the visible character shapes | Contract still needed for a fixed grid | Do not substitute alpha-based detection for known cell geometry. |
Automatic slicing uses the image's alpha information to find sprites. It does not mean “recover the intended fixed grid.” A character occupying a small part of a large cell and a character reaching near its cell edge can lead to different detected regions. Choose the method that matches the exported asset's organization rather than accepting the first visually tidy result.
After slicing, select several SpriteRects, including the first and last occupied cells and a cell beside a gutter. Compare their positions and sizes with the contract. A correct total rectangle count does not prove each rectangle is correct.
Verify offset, padding, and empty cells
Treat offset and padding as separate layout inputs. Offset locates the grid relative to the texture edges; padding accounts for space between cells. Unity's Slice dialog reference lists these controls along with Pixel Size and Column & Row settings.
Inspect the first row and column after entering the values, then inspect the far edge. A wrong starting offset can shift every slice. A wrong gap can make the error grow across successive cells. Do not repair the last rectangle alone when the error originates in the grid settings.
Decide whether empty cells should remain as rectangles. The Keep Empty Rects option affects this choice. A deliberate blank entry may belong to a particular sequence; unused export padding may not. Record the decision, because an unexpected blank sprite can affect a later animation assembly even when the occupied poses look correct.
Use these branches when the slice does not match:
- Every rectangle starts too far from its pose: check the grid offset and original margin.
- Early cells align but later cells drift: check padding, cell dimensions, and column or row count.
- Rectangle count differs from the expected capacity: inspect the chosen grid mode and empty-cell policy.
- Rectangles follow opaque shapes rather than cells: verify that Automatic slicing was not used for a fixed-grid contract.
Inspect pivot positions and units explicitly
Record the pivot's unit mode before interpreting its values. Unity 6.0 supports normalized and pixel pivot units in the Sprite Editor. Both use the sprite rectangle's bottom-left as their origin; normalized (1, 1) identifies its top-right. The Sprite Editor window reference documents this coordinate convention.
A pair of numbers without a unit mode is incomplete evidence. For a hypothetical 64 by 64 rectangle, normalized (0.5, 0) and pixel (32, 0) describe the bottom center of that rectangle. This equivalence follows from those dimensions; it should not be copied to rectangles with other widths.
Choose a pivot from the project's placement requirement. A ground-contact reference and a visual-center reference solve different tasks. A consistent pivot setting also cannot prove that the artwork inside every cell shares a consistent reference point. Inspect several poses against the same scene reference when verifying the resulting animation.
If all poses shift together, investigate import scale, pivot, and scene placement. If one pose shifts relative to the others, inspect its rectangle and the source layout before applying a global pivot adjustment. The sprite jitter diagnosis guide explains why changing artwork bounds and a changing anchor require different checks; use that distinction when deciding whether the problem belongs to the source or the import.
Apply, inspect sub-assets, and record the result
Apply the Sprite Editor changes, then expand the texture in the Project window and inspect its sprite sub-assets. Compare the count and identities with the accepted layout. Check the sprites used by the animation or scene, especially after re-slicing an existing texture; the presence of new rectangles alone does not prove that the intended sprites are in use.
Use this copyable acceptance record:
Unity version and project revision:
Source texture and export revision:
Recoverable pre-slice version:
Texture Type / Sprite Mode:
Pixels Per Unit:
Grid mode: Cell Size / Cell Count:
Cell dimensions or columns/rows:
Offset / padding:
Keep Empty Rects decision and reason:
Slice method for existing SpriteRects:
Expected / actual SpriteRect count:
Representative rectangle positions and sizes:
Pivot unit mode / values / placement intent:
Changes applied: yes / no:
Expected / actual sprite sub-assets:
Downstream animation or scene references checked:
Editor settings and scene evidence:
Decision: accept / revise / blocked:
Remaining unverified behavior:
Acceptance should identify the source revision, slice geometry, and resulting assets clearly enough for another person to reproduce the decision. Scene playback remains a separate observation: record it when performed, and leave it unverified when only the import settings have been reviewed.
About the author: The FrameSprite Workflow Team documents sprite production workflows for its own product. This draft used AI writing assistance and source-based editorial review; it reports no new engine test. Editorial ownership · Contact and corrections.
About the author
- We operate FrameSprite, a browser tool for indie game asset workflows. We publish practical sprite-sheet and animation export guides with downloadable examples, verification methods, and explicit limitations. Editorial ownership and corrections: https://www.framesprite.com/about#workflow-team. Contact: https://www.framesprite.com/contact.
Comments
Join the discussionNo comments yet. Be the first to comment.